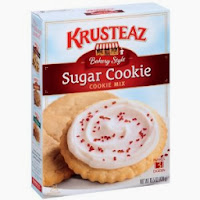
Decorating and making cookies is something you just have to do for Christmas. It's pretty much a crime not to. So last year, I made ginger bread cookies, however my family didn't really care for them as we're not big spice eaters. So this year I decided to make sugar cookies (my mom's favorite). I made them this past Sunday and then decorated them Tuesday evening. I actually ended up using a box mix, which is practically hedonistic in my family. However, they taste pretty good (although they'll never be as good as homemade ones, however, homemade takes ages because the dough has to be chilled.) I used Krusteaz Sugar Cookie Mix and made a double batch.
I wanted gingerbread men and women (in sugar cookie form). My mom also bought me a new cookie cutter that's a really pretty snowflake, so I used that too, as well as Christmas trees.
The hardest (and coolest in the end) cookies to make were the layers of my 3-D Christmas tree. I got the idea from a set in Jo Ann Fabrics. The tree was so cute and I really wanted to get it! However, upon closer observation, there was pre-baked cookies in the set. Gross! So, I decided I would make my own. It was a lot harder than I imagined it (isn't it always?). I used my spatula to create a 6-point star (like a Star of David). I made one, and then put it back on top of the dough to make one the exact same size. I then arranged them to look like a Star of David. I then cut off the overlapping parts and removed the remaining part of the triangle. After, I pressed the overlapping bits onto the bottom triangle. Now obviously, this would not hold up in the oven, so I placed it back on my rolled out down and used the spatula to trace it. Now I have my unbroken Star of David, which is going to be the bottom layer of the tree.
For every new layer of my tree, I took the previous layer and made an identical one using my spatula. I then removed the top star and trimmed it so it was smaller than the previous, and so on and so forth until I thought I couldn't make them any smaller. Then, a made a cylinder with some remaining dough and put little tiny "spokes" on them. It wasn't very pretty, but icing covered it up in the end, so it served it's purpose as the top of the tree. I did have to put a toothpick through it in the oven because it started to fall, but the toothpick kept it upright. You do have to watch so that you don't burn the smaller cookies when in the recipe. This is what the final product looked like:
The cookies were held together by icing and I used a Wilton cake decorating set that I got from Bed, Bath, and Beyond to ice them. I used Tip #21 to ice them.
What kinds of things are you guys making this holiday season?
Abby xxx
Wishing you the best this holiday season
~~~~~~~~~~~~~~~~~~~~~~~~~~~~~~~~~~~~~~~~~~~~~~~~~~~~~~~~~~~~~~~~~~~~~~~~~~~~~~~~~
Links
Email: abbydoeslife@gmail.com
Twitter: https://twitter.com/AbbyDoesLife
Instagram: http://instagram.com/theamericancompanion


No comments:
Post a Comment